
Unity3D - How to make a Pause Menu
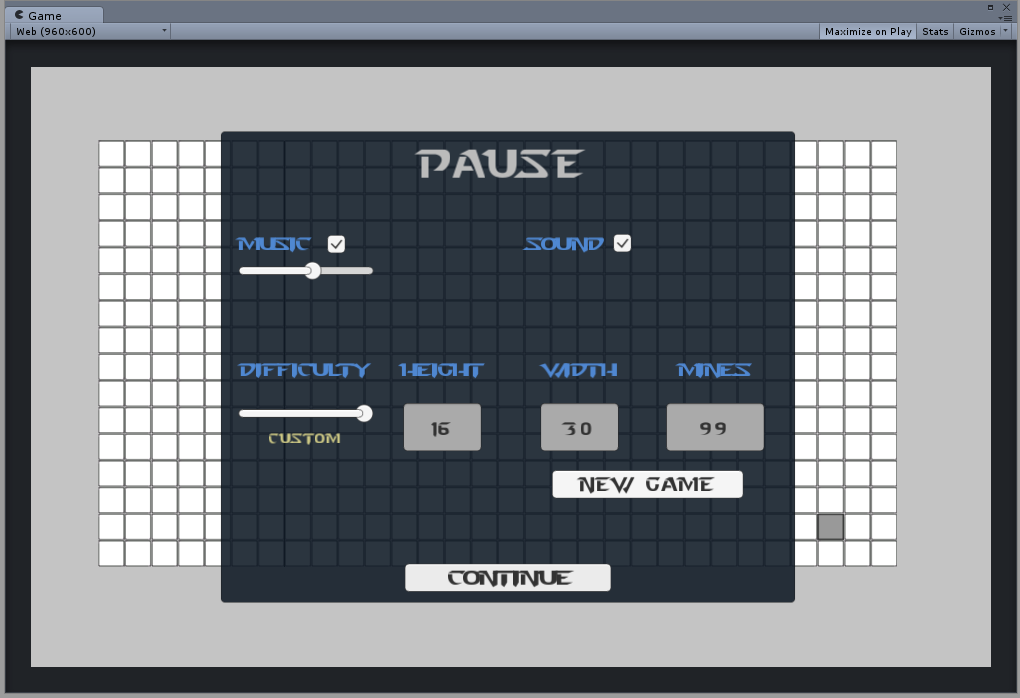
In this post, I’ll try to explain how to make a Pause Menu that pauses the game and displays a menu with various controls for this Minesweeper template example.
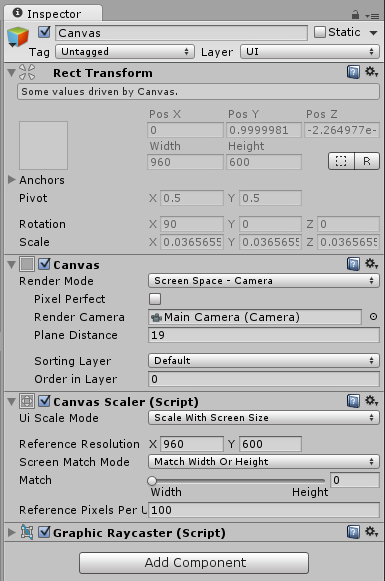
Step 1 - Set up the Canvas
All of the UI elements are placed on a Canvas. To start creating our UI:
- Right click in project hierarchy and add a
Canvasto your scene. Remember that this will automatically create anEvent Systemthat has to be in the same level with theCanvas. - Set the
Render ModetoScreen Space - Cameraand chooseMain Cameraobject inRender Camerafield. - Set the plane distance according to your scene.
Step 2 - Add the Panel
Panel is the area where we’ll group the controls. First, we create a panel that will outline the layout of our menu.
- Right click on
Canvasand addUI/Panel. Rename the panel to “Pause_Menu_Panel”. - Resize the panel according to your design needs.
- Optional: Add a material with alpha channel and play with transparency values of the panel.

I strongly recommend watching Unity’s “Panes, Panels and Windows” training video if you want to grasp the new UI system that came with Unity 4.6.
Step 3 - Populate the Panel
Now that we have our Pause Menu area, we can populate them by the Visual
and Interaction components however we want. Below, I preferred
using Panels to group certain elements that can be seen in project hierarchy. I have used Text,
Slider, Input Field,
Button and Toggle
components for this Minesweeper template.
For the sake of shortness of the post, I’ll explain only Music settings components (Text, Toggle & Slider) and the Continue Button (Button) interactions.
Music settings controls will be under the Music_Settings_Panel and Continue Button will be a child of UI_Canvas. To populate the Pause_Menu_Panel:
- Add another
Panelunder thePause_Menu_Panelobject. Rename it “Music_Settings_Panel”. - Add
Slider,TextandToggleobjects to theMusic_Settings_Panel. - Set
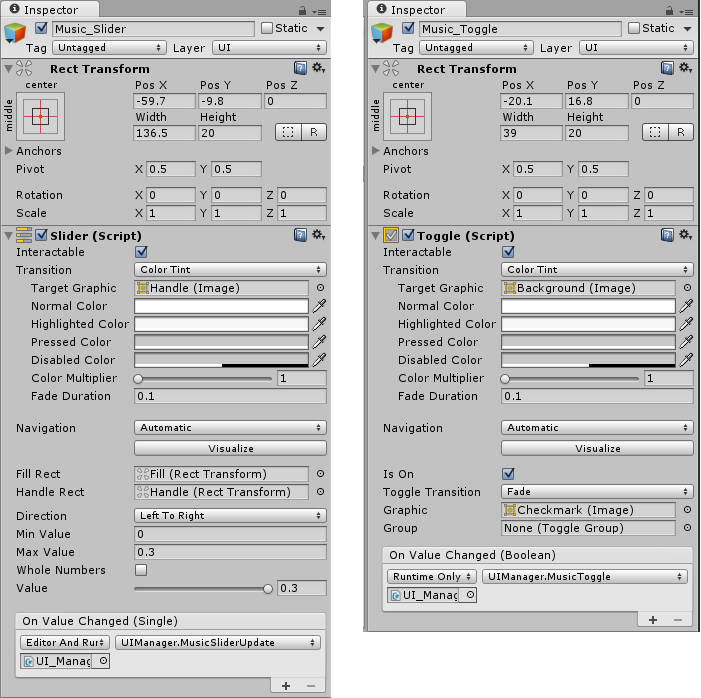
Slider’sMin Valueto0,Max ValueandValueto0.3or any value suitable for your environment. The file I used sounded right in the range of 0 - 0.3, hence the slider values. Remember not to checkWhole Numbers. - Set
Text’sTextvalue to “Music” - Add a
Buttonunter thePause_Menu_Panelobject. Rename it “Button_Continue”. Set itsTextto “Continue”.
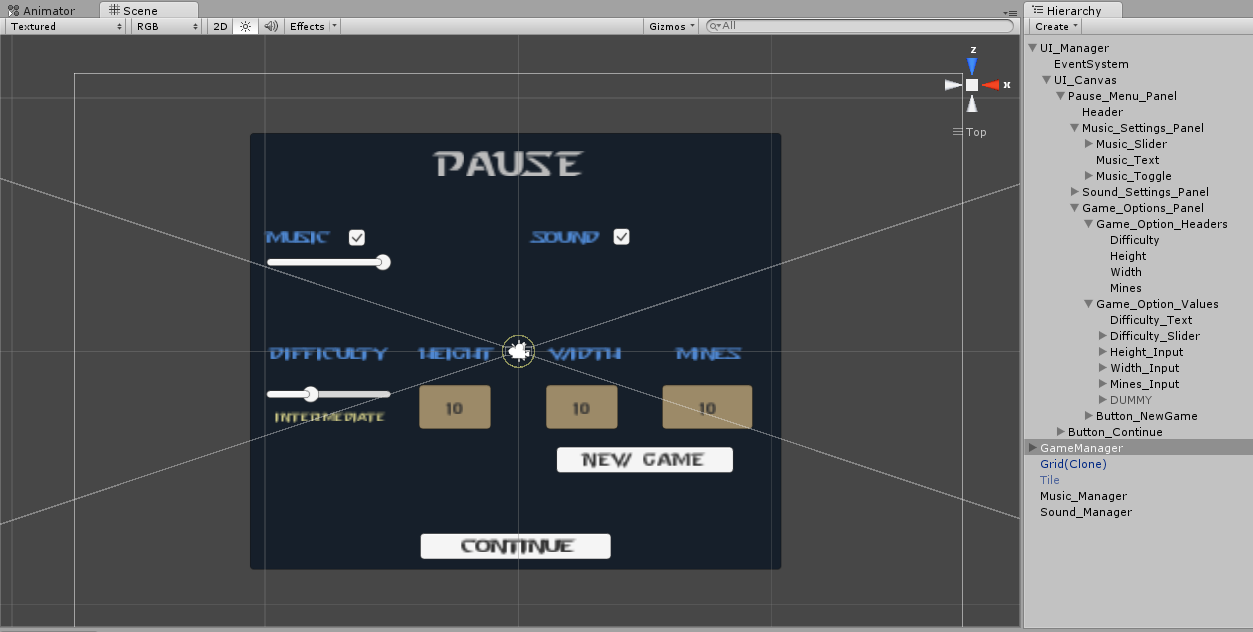
Quick recap: Here you can see the project hierarchy: on top is a UI_Manager GameObject that groups the whole controls that are contained in the Menu. Under
UI_Manager GameObject, there is the UI_Canvas on which every UI element lives. UI elements are grouped with Panels
Step 4 - Wire your Components to your game
I find it useful to create managers assigned for certain tasks that also interact with other managers. For example, I used:
- A GameManager to handle grid generation and game settings
- A UIManager to handle UI related tasks such as toggling pause menu by interacting with GameManager, updating input fields with the game settings values and helping GameManager to create a grid associated with the custom settings
- A MusicManager to play the music file and set the volume by interacting with UIManager
Game Manager
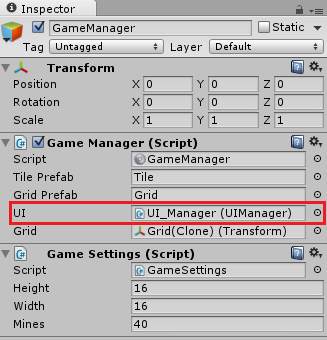
Game manager script will handle toggling the Pause Menu and stopping the time using a public UIManager variable,
which can be assigned from inspector by simply dragging UI_Manager GameObject onto the scripts variable field.
- Add an empty GameObject, change its name to “GameManager”
- Add a C# script that defines related functions. In this case, we will define a function that will be called when
Escbutton is hit and Continue button is pressed that continues or stops the time and makes the pause menu visible and invisible.
public class GameManager : MonoBehaviour
{
    //----------------------------------------
    // handles
    public UIManager UI;

    //-----------------------------------------
    // function definitions
    void Start () { ... }
    void GenerateMap(GameSettings settings){ ... }
    public void StartNewGame() { ... }

    public void TogglePauseMenu()
    {
        // not the optimal way but for the sake of readability
        if (UI.GetComponentInChildren<Canvas>().enabled)
        {
            UI.GetComponentInChildren<Canvas>().enabled = false;
            Time.timeScale = 1.0f;
        }
        else
        {
            UI.GetComponentInChildren<Canvas>().enabled = true;
            Time.timeScale = 0f;
        }

        Debug.Log("GAMEMANAGER:: TimeScale: " + Time.timeScale);
    }

}
Music Manager
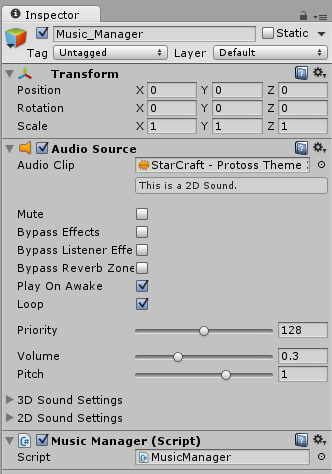
- Add an empty GameObject, change its name to “Music_Manager” and add the following components to it:
- An
Audio Sourcethat contains the music file - A C# script that defines music related functions
- An
  public class MusicManager : MonoBehaviour {

    public void SetVolume(float val)
    {
        GetComponent<AudioSource>().volume = val;
    }
}
UI Manager
I find it handy to keep references of other managers in a manager as public objects. UIManager simply checks for keypresses in Update() function.
If Esc is pressed, UIManagers calls GameManager’s public TogglePauseMenu() function. UIManager also defines the public functions to be called
on Toggle and Slider Update events. These functions are later assigned in the related component from the inspsector.
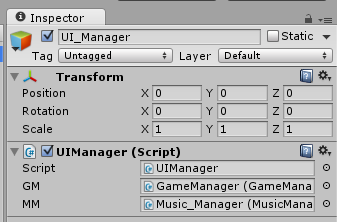
- Add an empty GameObject to the hieararchy, change its name to “UI_Manager”
- A C# script that defines related functions
public class UIManager : MonoBehaviour
{
    public GameManager GM;
    public MusicManager MM;

    private Slider _musicSlider;

	// Use this for initialization
	void Start ()
	{
	    //--------------------------------------------------------------------------
        // Game Settings Related Code


        //--------------------------------------------------------------------------
        // Music Settings Related Code
        _musicSlider = GameObject.Find("Music_Slider").GetComponent<Slider>();
	}

	// Update is called once per frame
	void Update ()
	{
	    ScanForKeyStroke();
    }

    void ScanForKeyStroke()
    {
        if (Input.GetKeyDown("escape"))     GM.TogglePauseMenu();
    }

    //-----------------------------------------------------------
    // Game Options Function Definitions
    public void OptionSliderUpdate(float val){ ... }
    void SetCustomSettings(bool val){ ... }
    void WriteSettingsToInputText(GameSettings settings){ ... }

    //-----------------------------------------------------------
    // Music Settings Function Definitions
    public void MusicSliderUpdate(float val)
    {
        MM.SetVolume(val);
    }

    public void MusicToggle(bool val)
    {
        _musicSlider.interactable = val;
        MM.SetVolume(val ? _musicSlider.value : 0f);
    }
}
Assign the Managers’ functions to Components
Now that we have defined the functions in Manager GameObjects that will be called when a certain event occurs, such as pressing the “Continue” button, it is time to assign them to the related components.
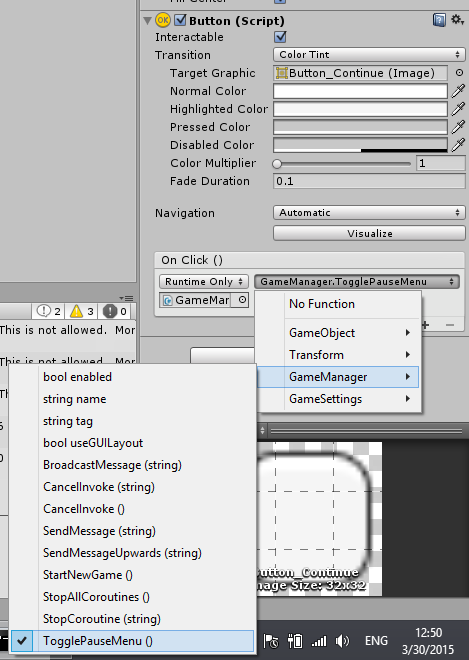
- Choose
Button_Continue(or however you named your “Continue”Button) from project hierarchy. Click the+below theOnClick()method. - Assign the
GameManagerto theObject Variable - Choose the
TogglePauseMenu()function as seen in the screenshot above. You can simply assign any public function that is defined in whatever object you assigned as the Object Variable to the Button Script. - Repeat this accordingly for
Music_SliderandMusic_Toggleas well. Remember, we have defined the public functions for theToggleand theSlidercomponent inUIManagerscript.
There we go. We have a Pause Menu with functional music settings panel that you can adjust the volume of the music or mute/unmute it. Thank you for reading thus far! If you have any questions or feedback, feel free to comment below:)